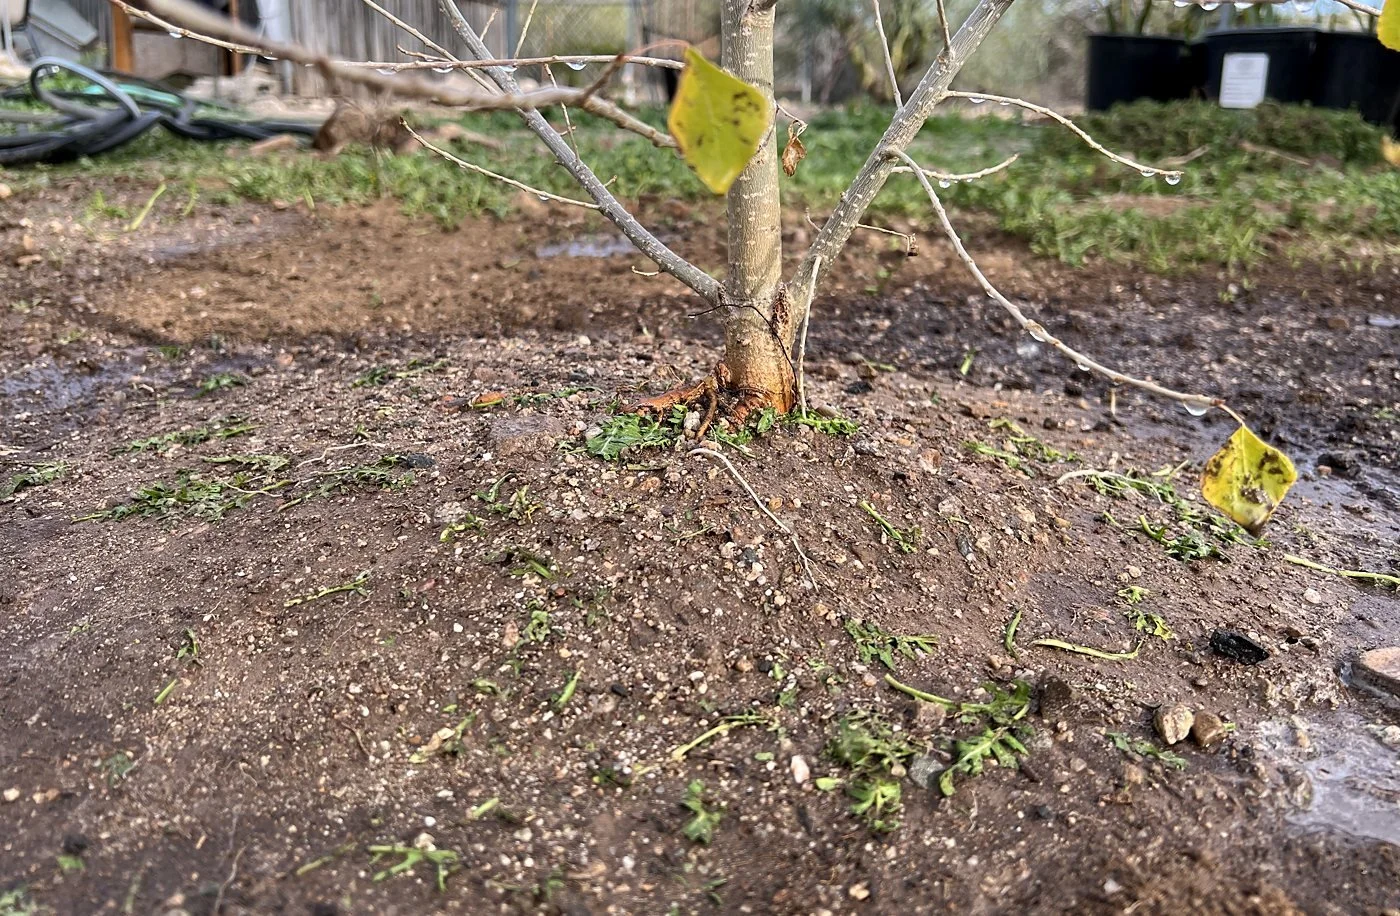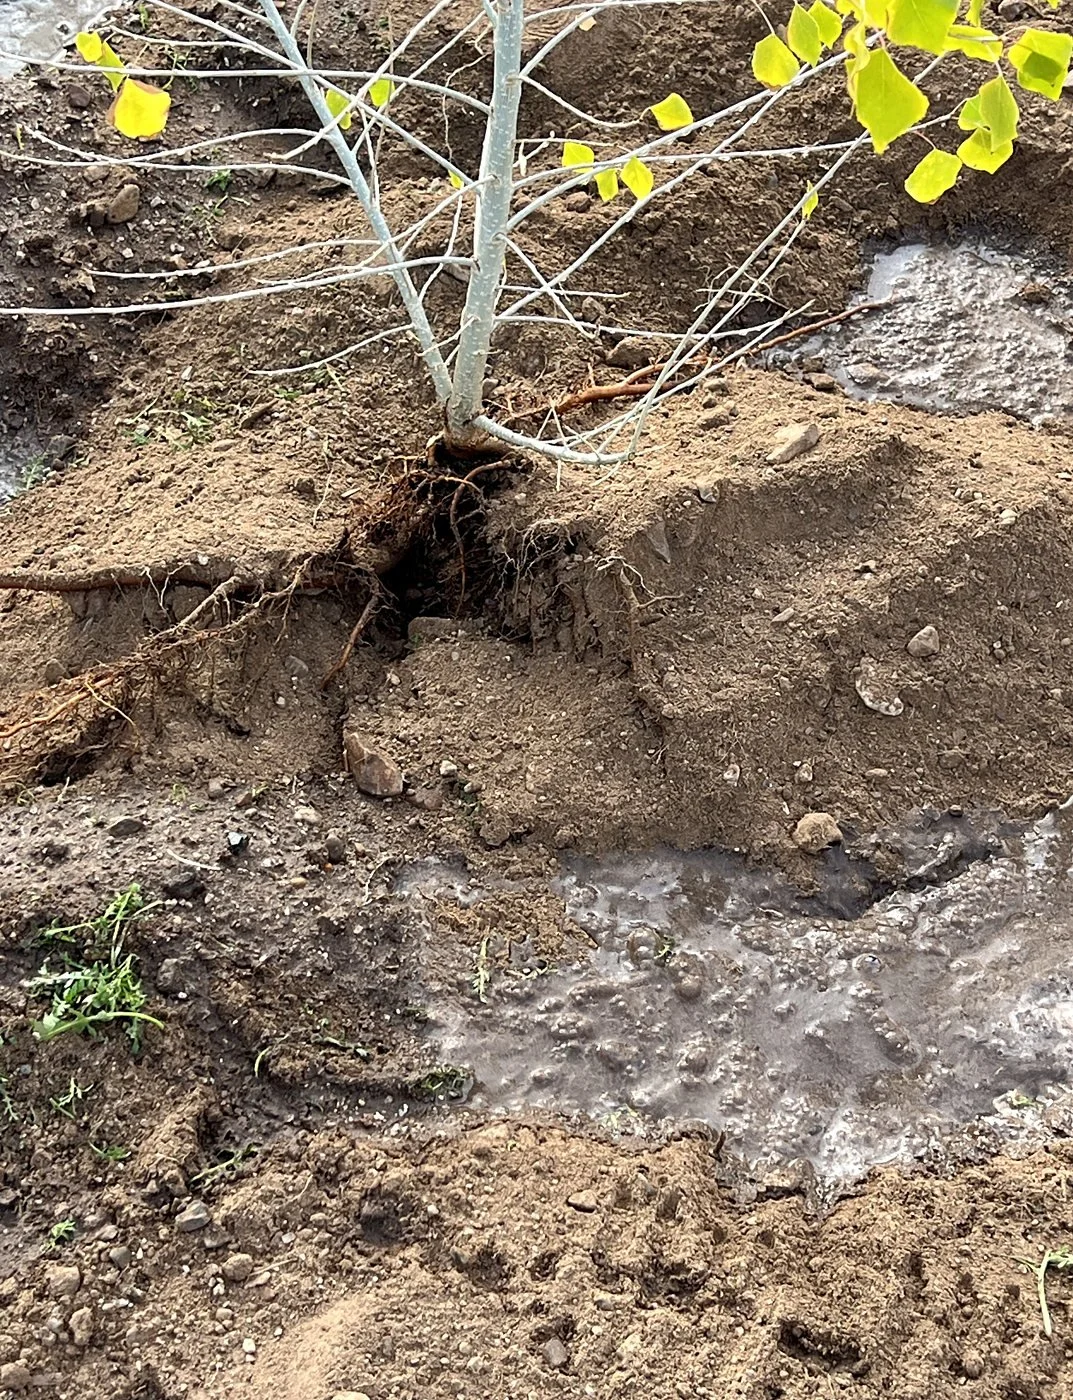
The transplanted tree in its new permanent home, root flare properly exposed and soil is settled on the long, lateral roots.
A careful move, an extraordinary result
When Justin transplanted his young Fremont cottonwood, he made room for the roots the tree already had. He protected the existing root structure, lifted carefully, dug trenches for lateral roots that ran several feet from the trunk, and replanted at the tree's natural depth.
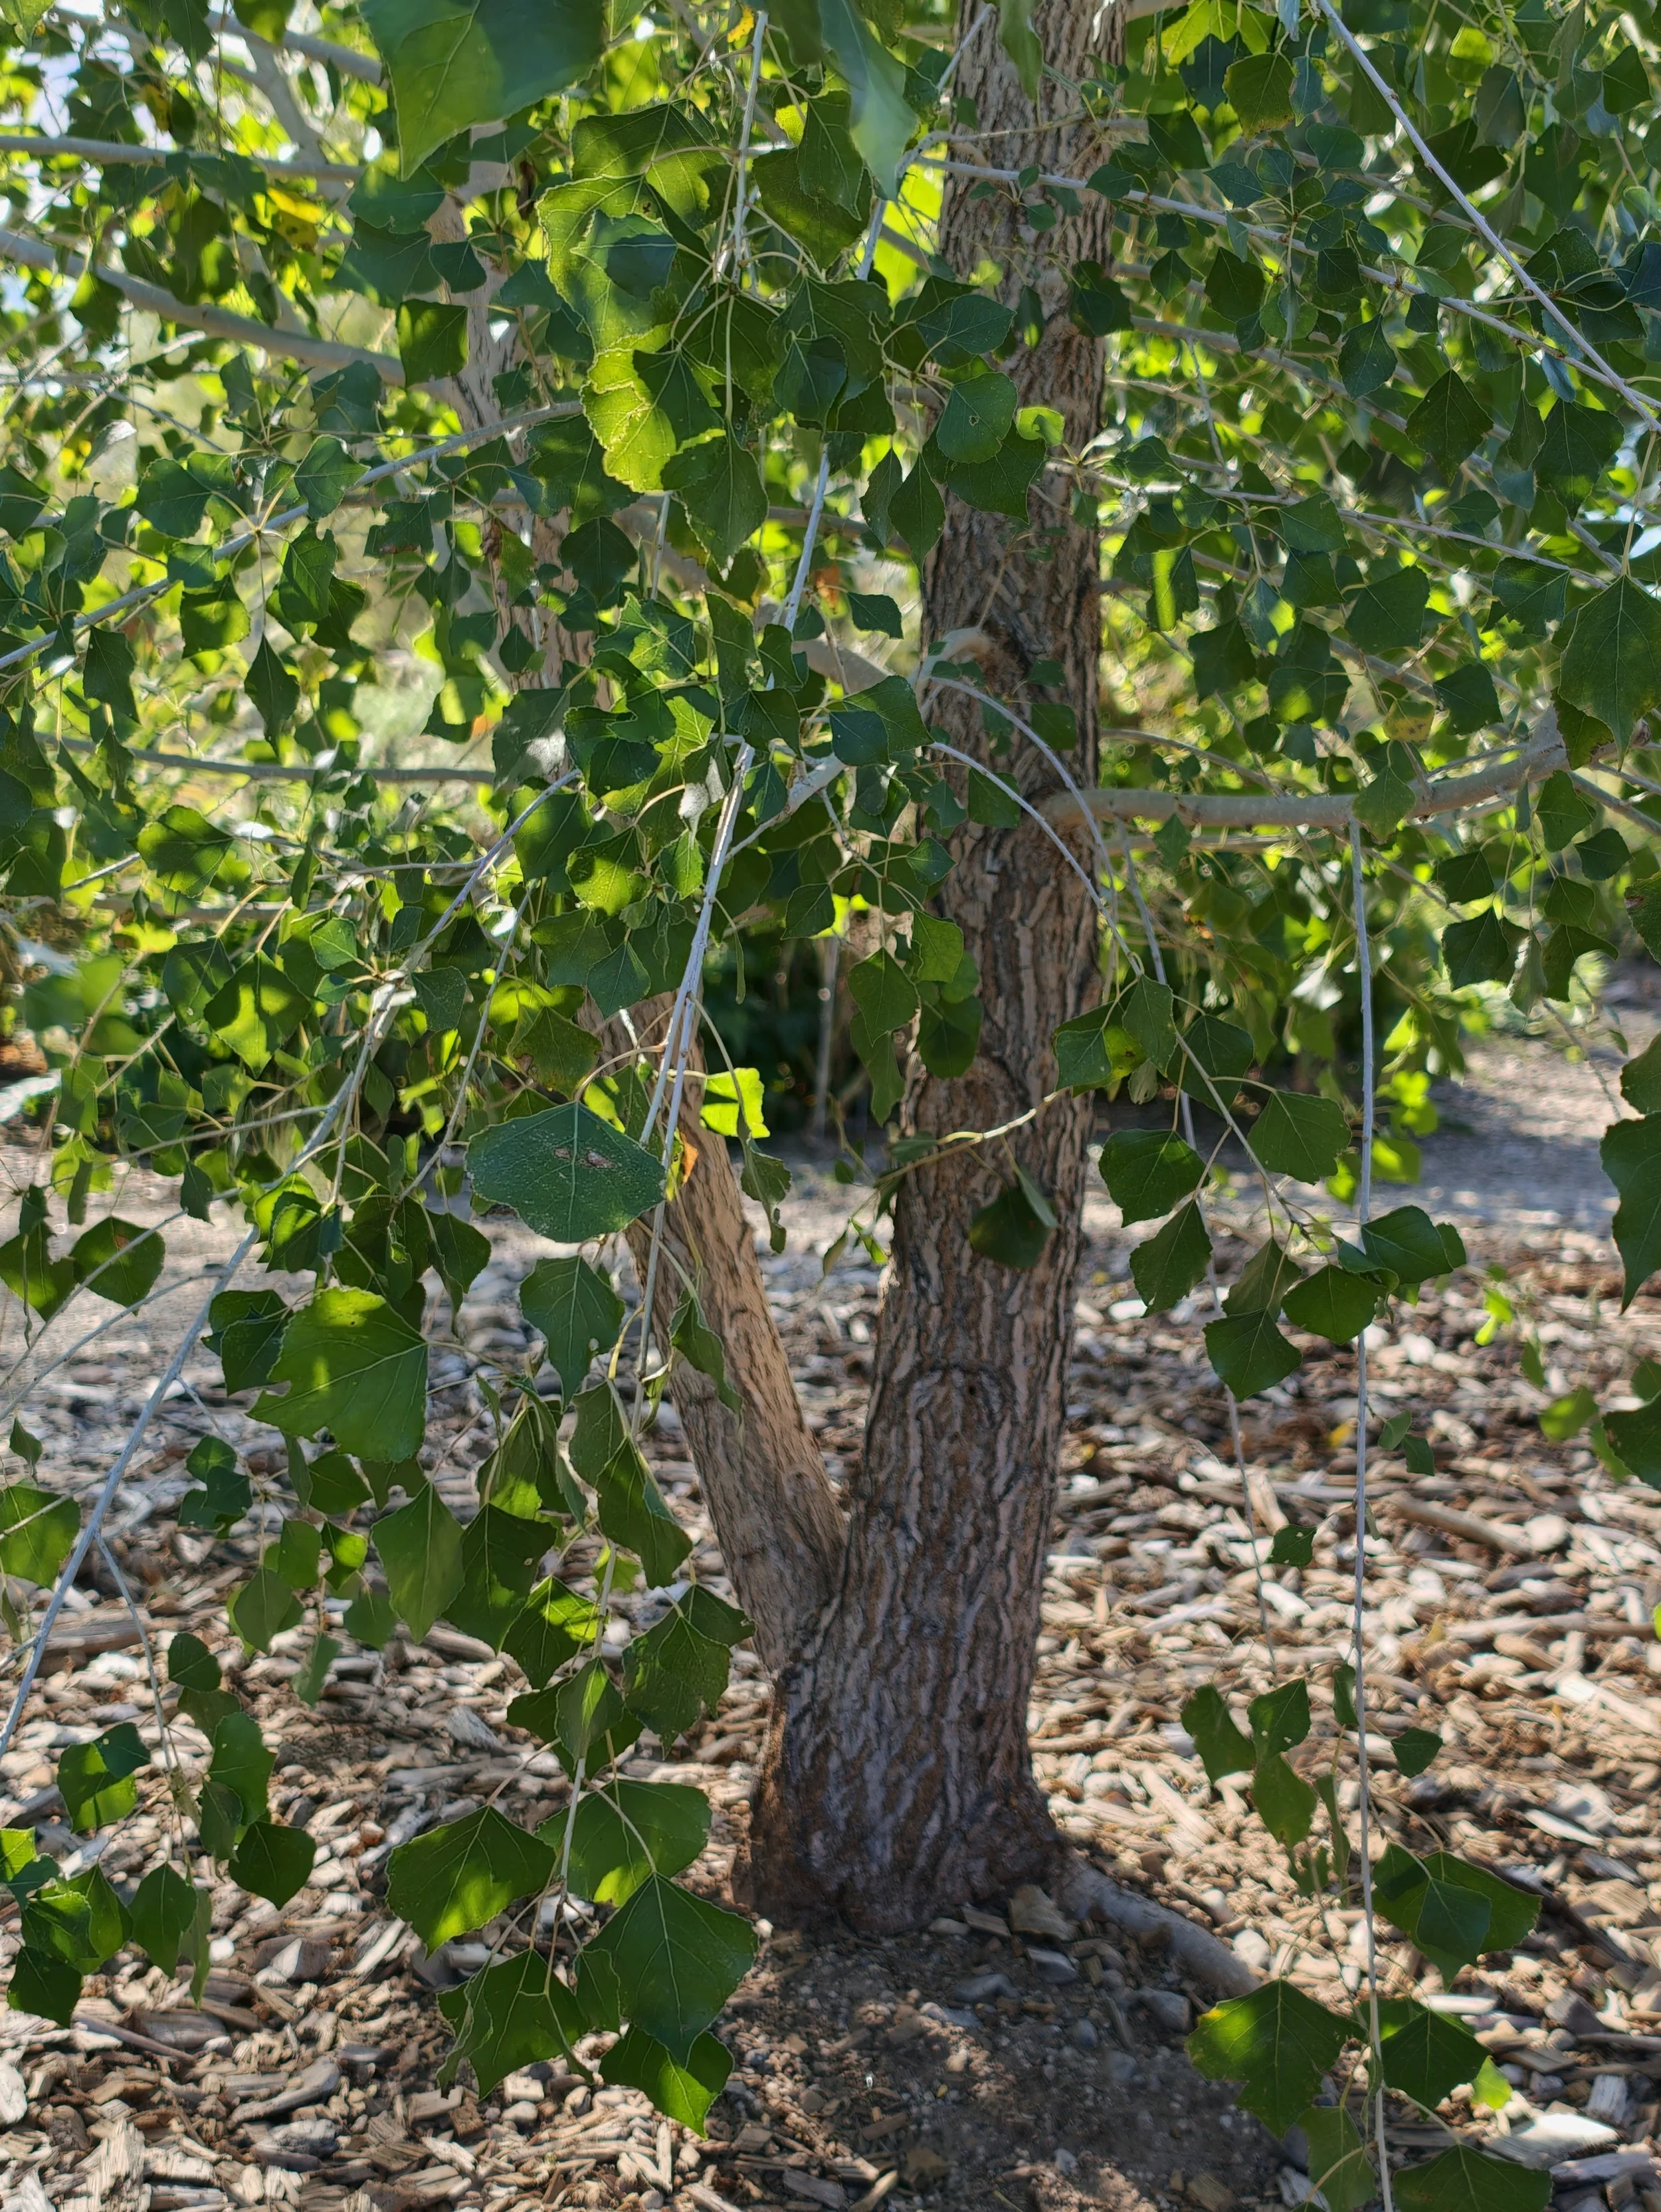
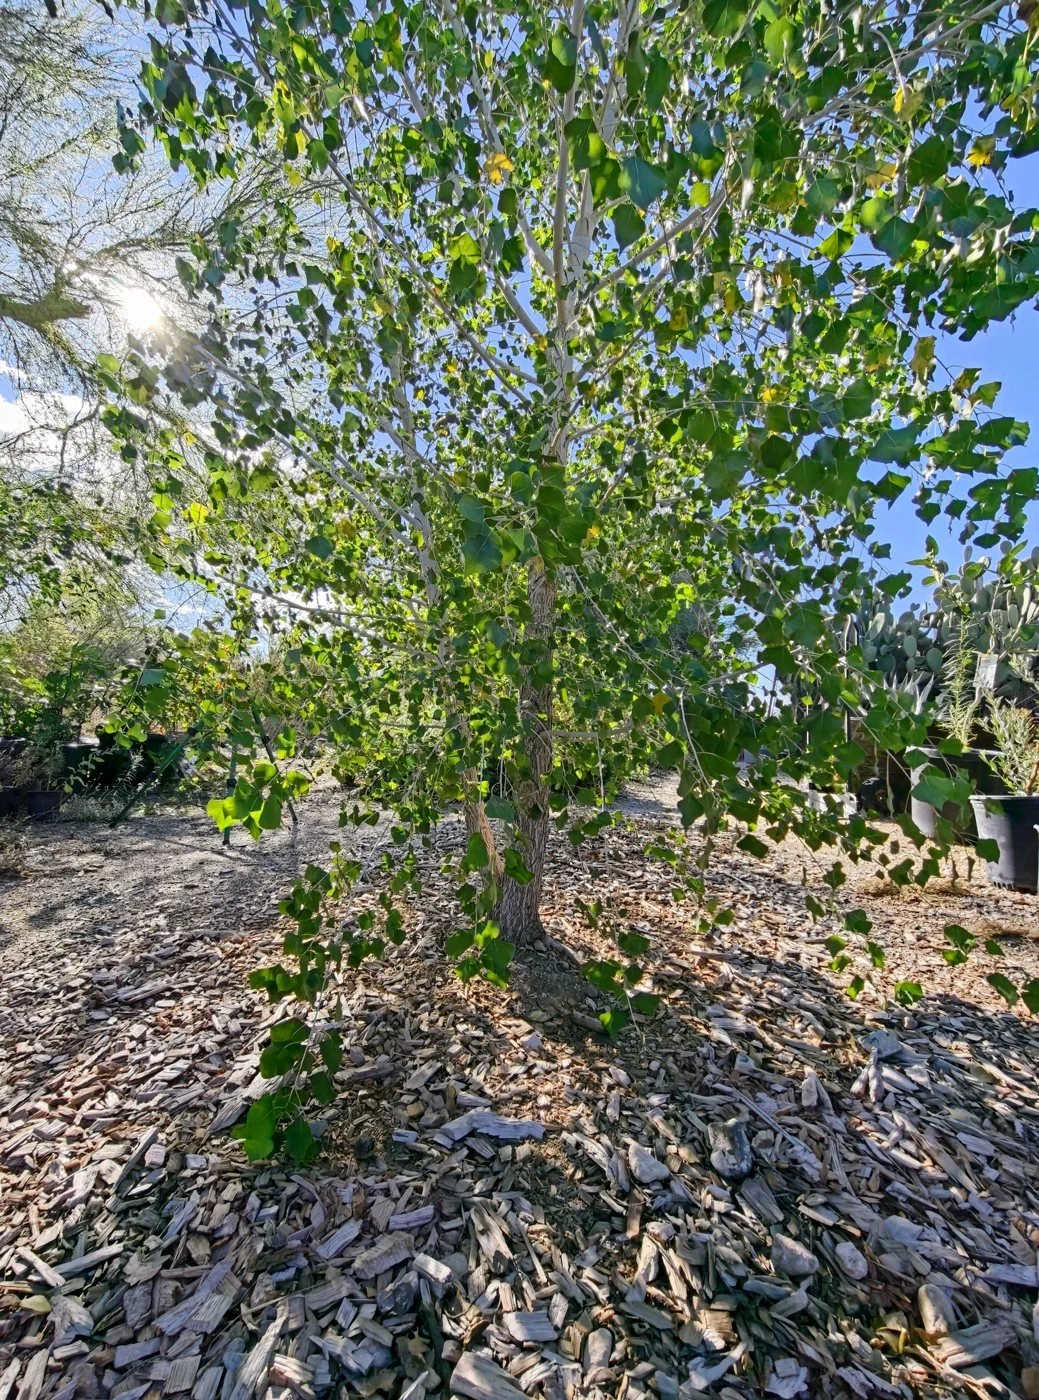
The photographs follow that work from excavation to replanting. The later canopy and root-crown views show the extraordinary success that followed: vigorous above-ground growth and a beautifully developed base after the tree's first growing season in its new location.
This cottonwood germinated from seed in Justin's own garden in June 2025. He moved it in January 2026 during cool weather. By November 7, 2026, it was about 17 months old and about ten months beyond transplant.
Here is how he approached the move—and why those choices matter.
1. Choose cool weather for the move
Justin transplanted the cottonwood in January, while temperatures were cool. For a deciduous tree such as Fremont cottonwood, cool-season conditions offer a gentler setting for transplanting than Tucson's intense summer heat.
A tree loses water through its foliage while its roots supply that water from the soil. Cooler weather reduces evaporative demand during the move and early adjustment. Matching transplant timing to the tree and local conditions is an important part of planning the job.
2. Excavate around the existing roots
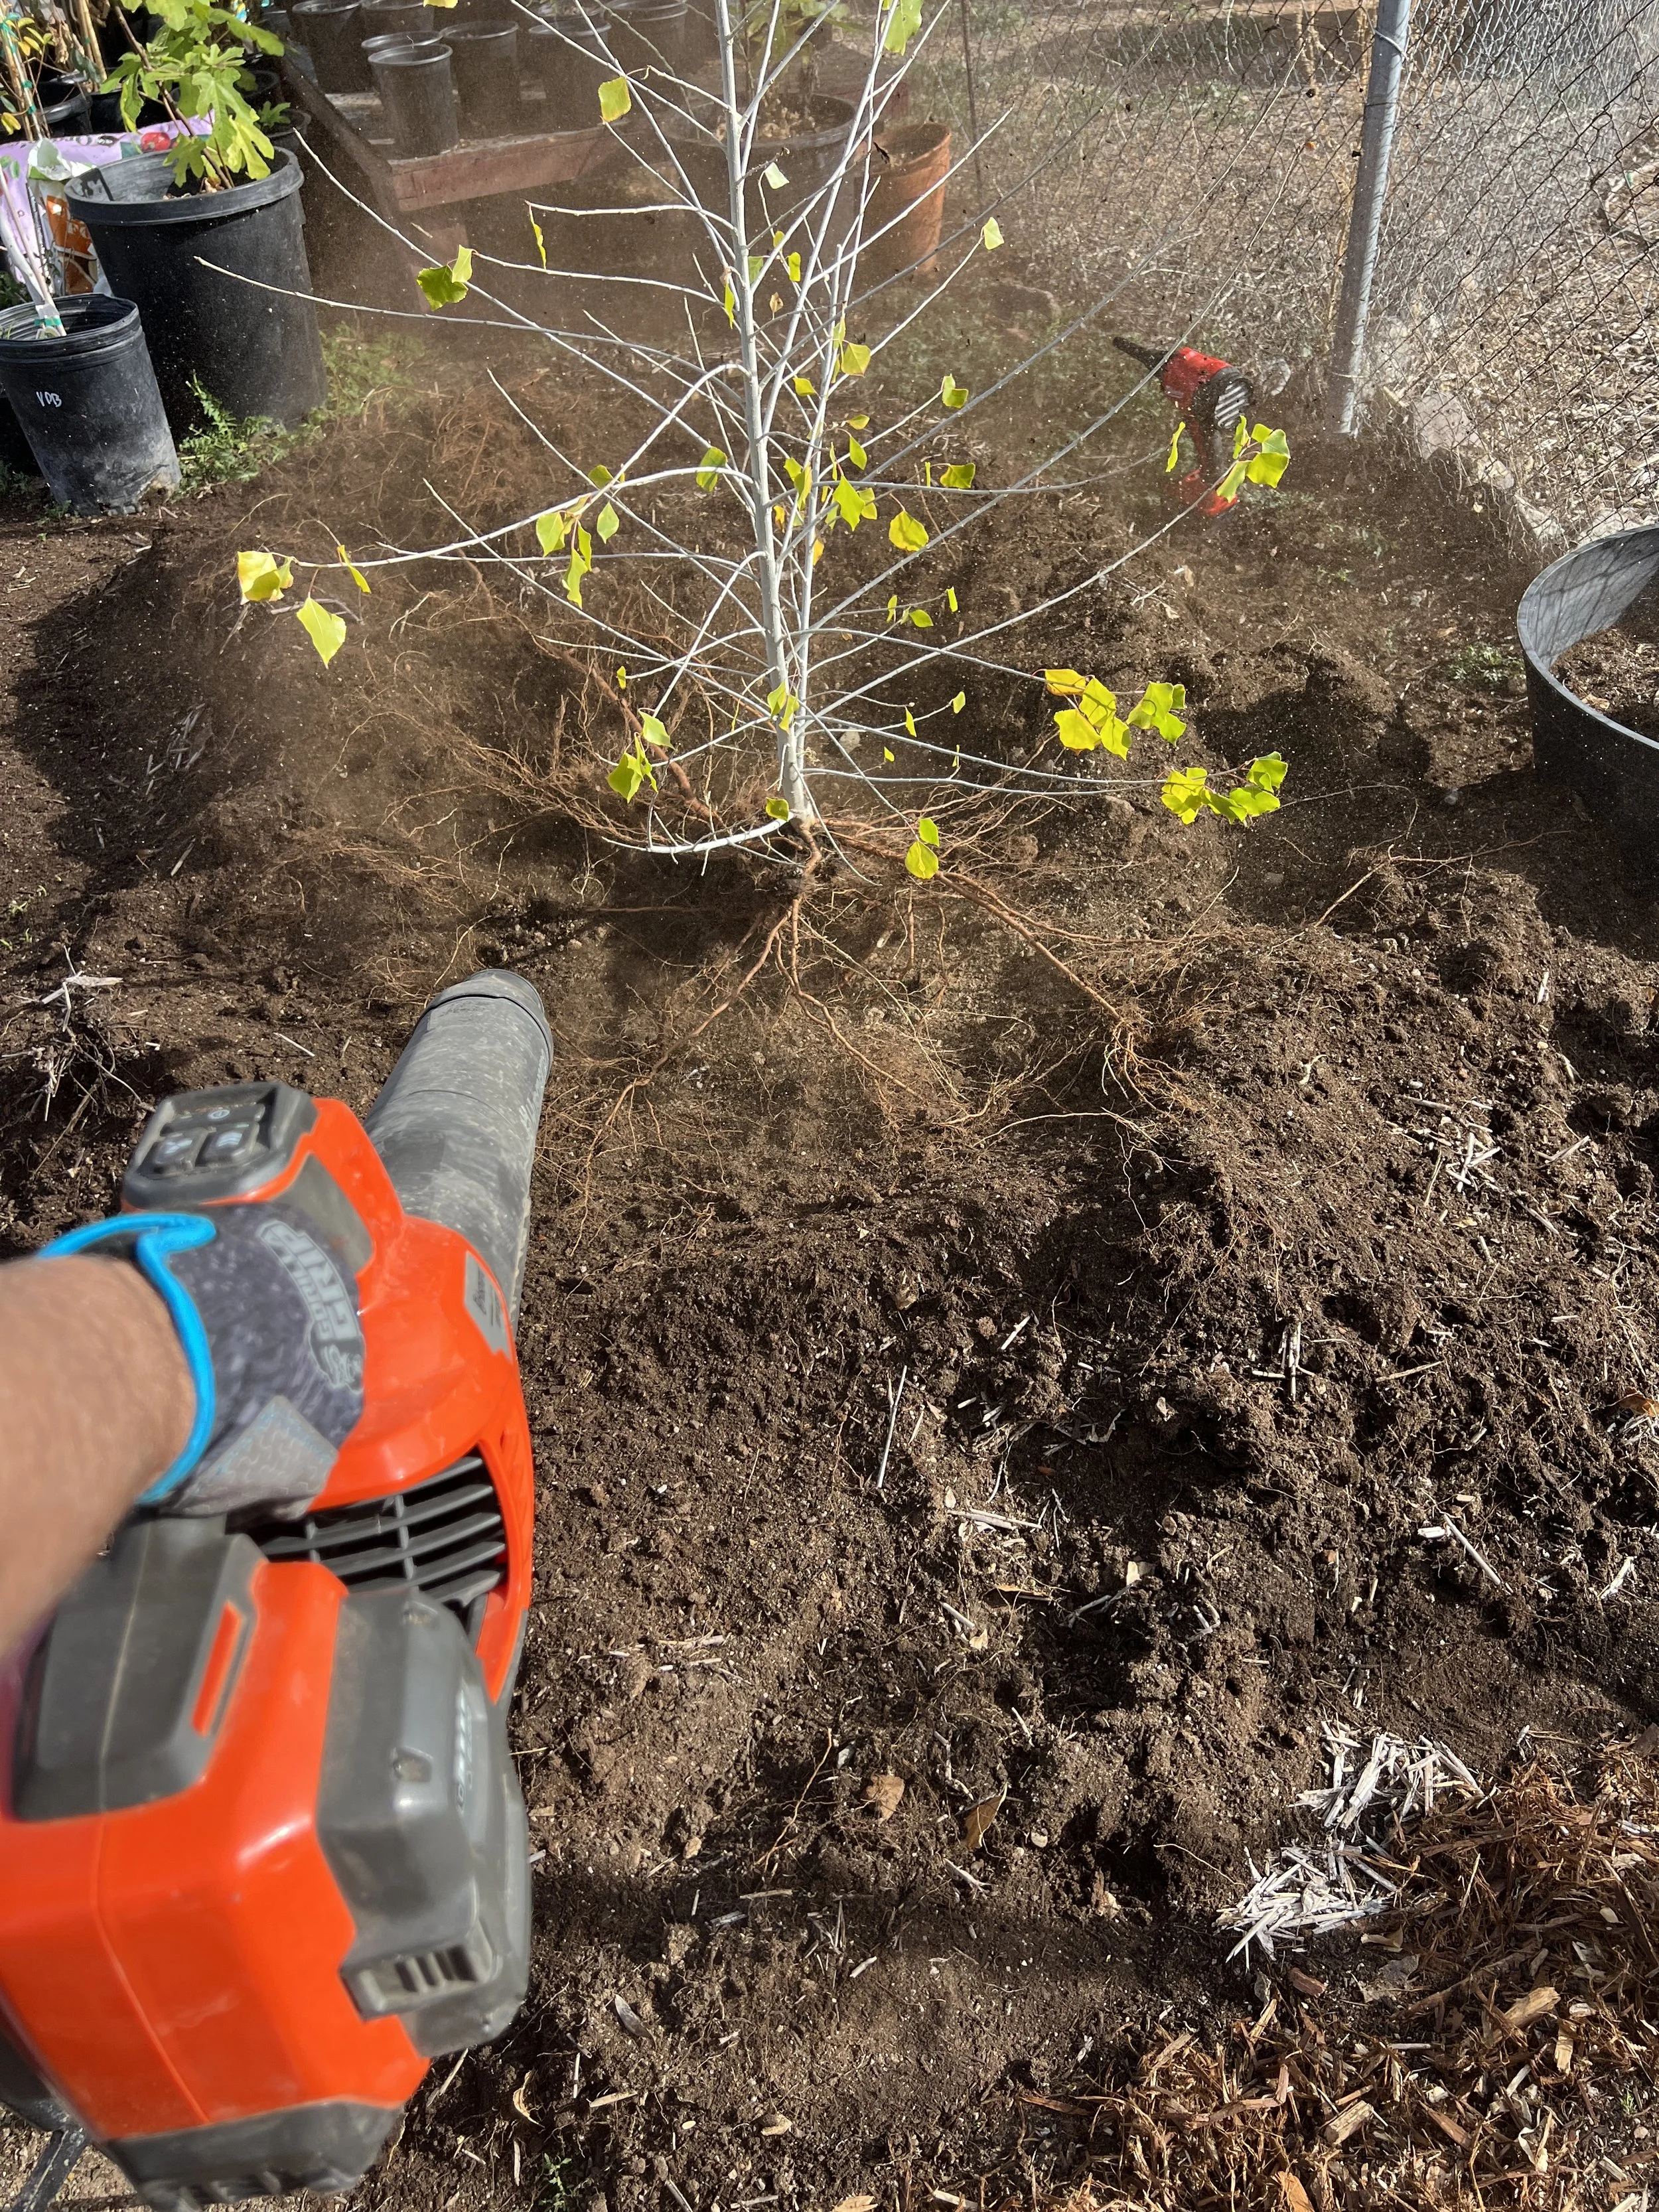
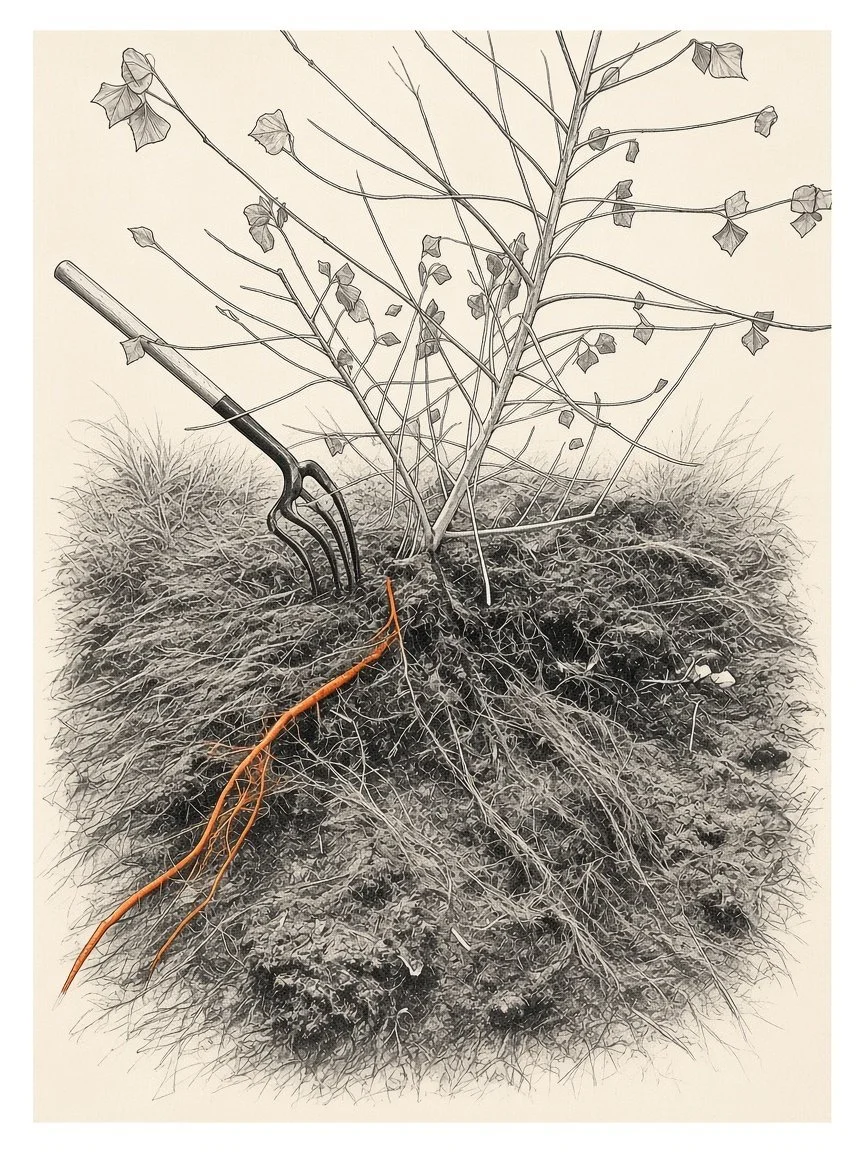
The photographs show the root system emerging as soil is cleared away. A garden fork is visible beside the roots, and other frames show a handheld leaf blower clearing loose soil. The focus of the work was preserving the existing root structure as the tree was freed from the ground.
Lateral roots spread outward from the trunk. Smaller branching roots extend through the soil around them. Following that spread during excavation helps you understand how much space the tree's roots occupy.
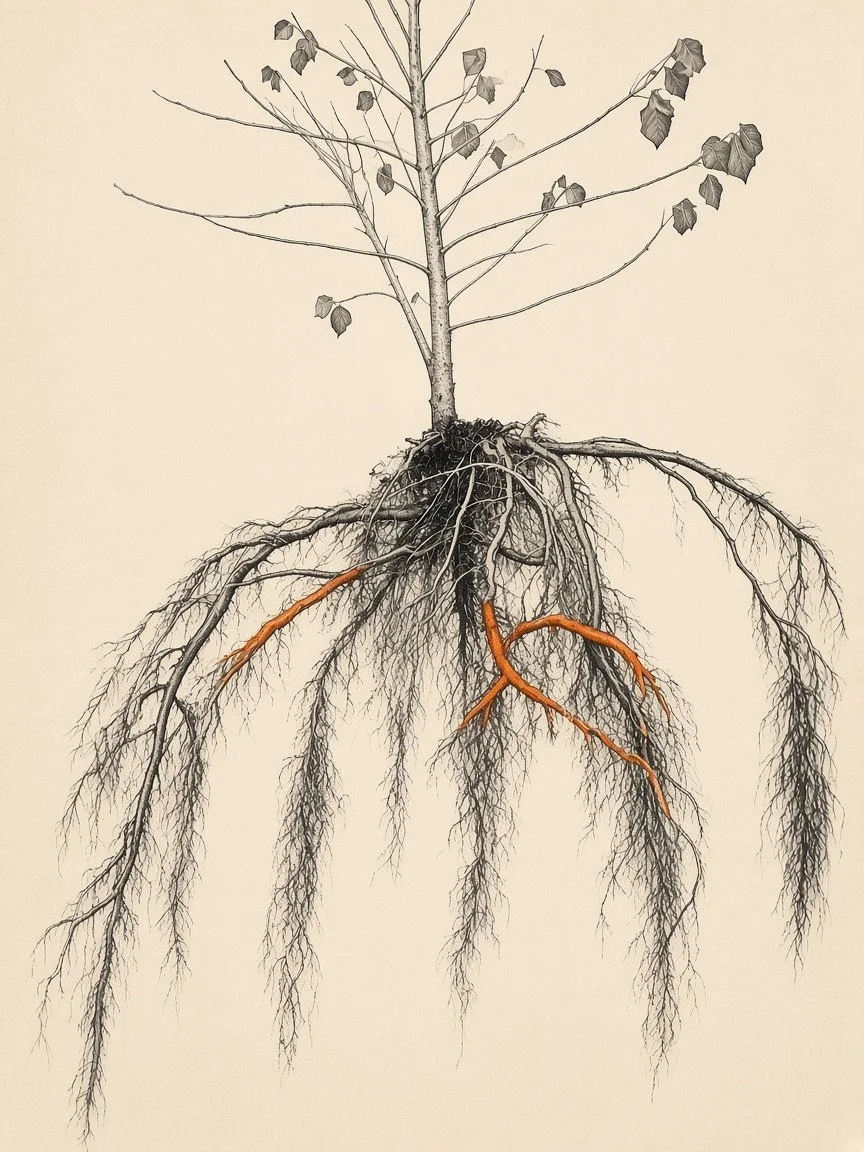
The drawing makes the branching pattern easy to follow. In this case, Justin's approach was to work with that pattern and retain the roots extending out from the tree.
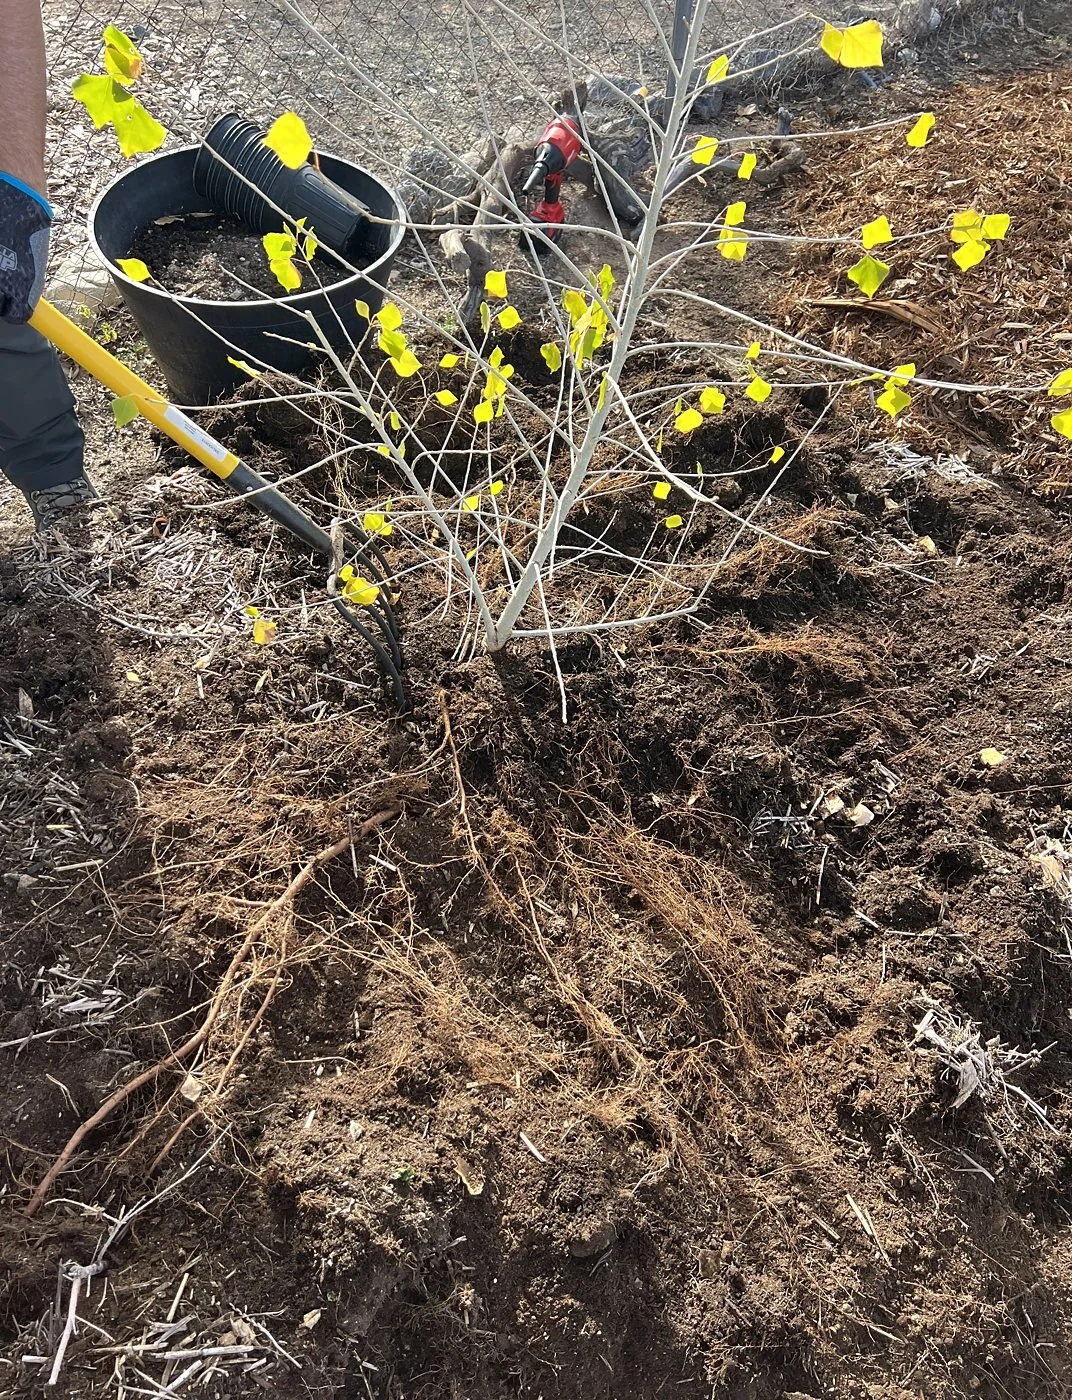
A pitch fork and blower make excellent tools for loosening soil from roots.
3. Lift carefully with the root network in mind
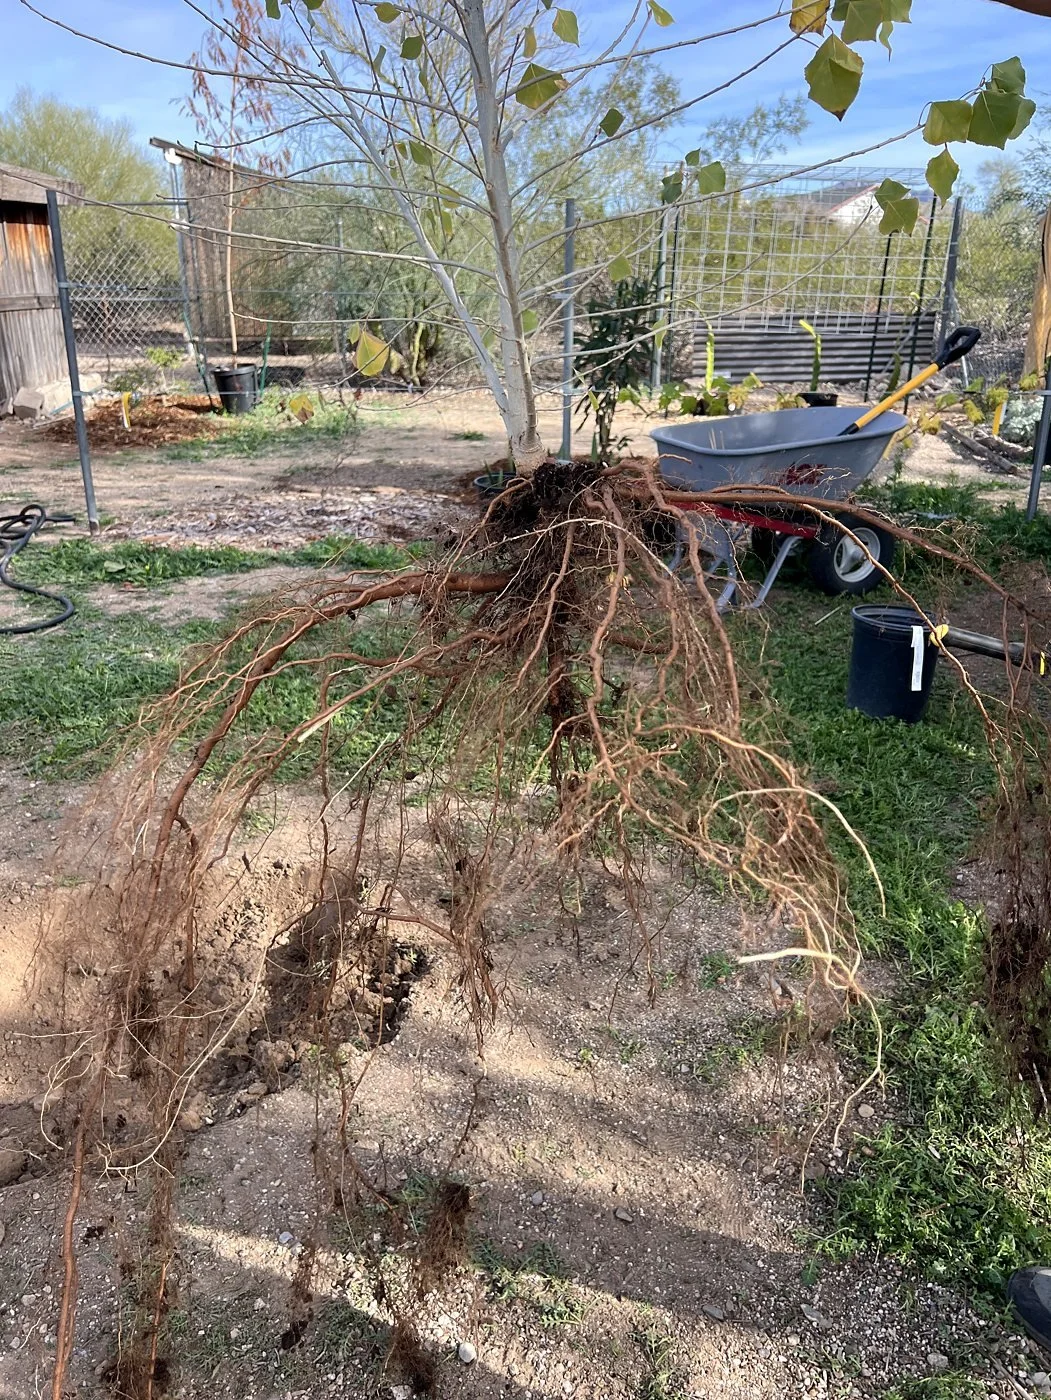
Once the tree was free, Justin lifted it carefully. This photograph gives a particularly clear view of the root network he was protecting: long laterals, finer branching roots and the central connection beneath the trunk.
Careful handling keeps attention on the whole tree. The roots need room during the move, just as they do in the planting space.
For homeowners planning a transplant, arrange suitable help and support for the root system before digging. The tree's size, species and root structure should guide the handling plan; a qualified arborist can help plan a larger or more involved move.
4. Make the planting space fit the roots
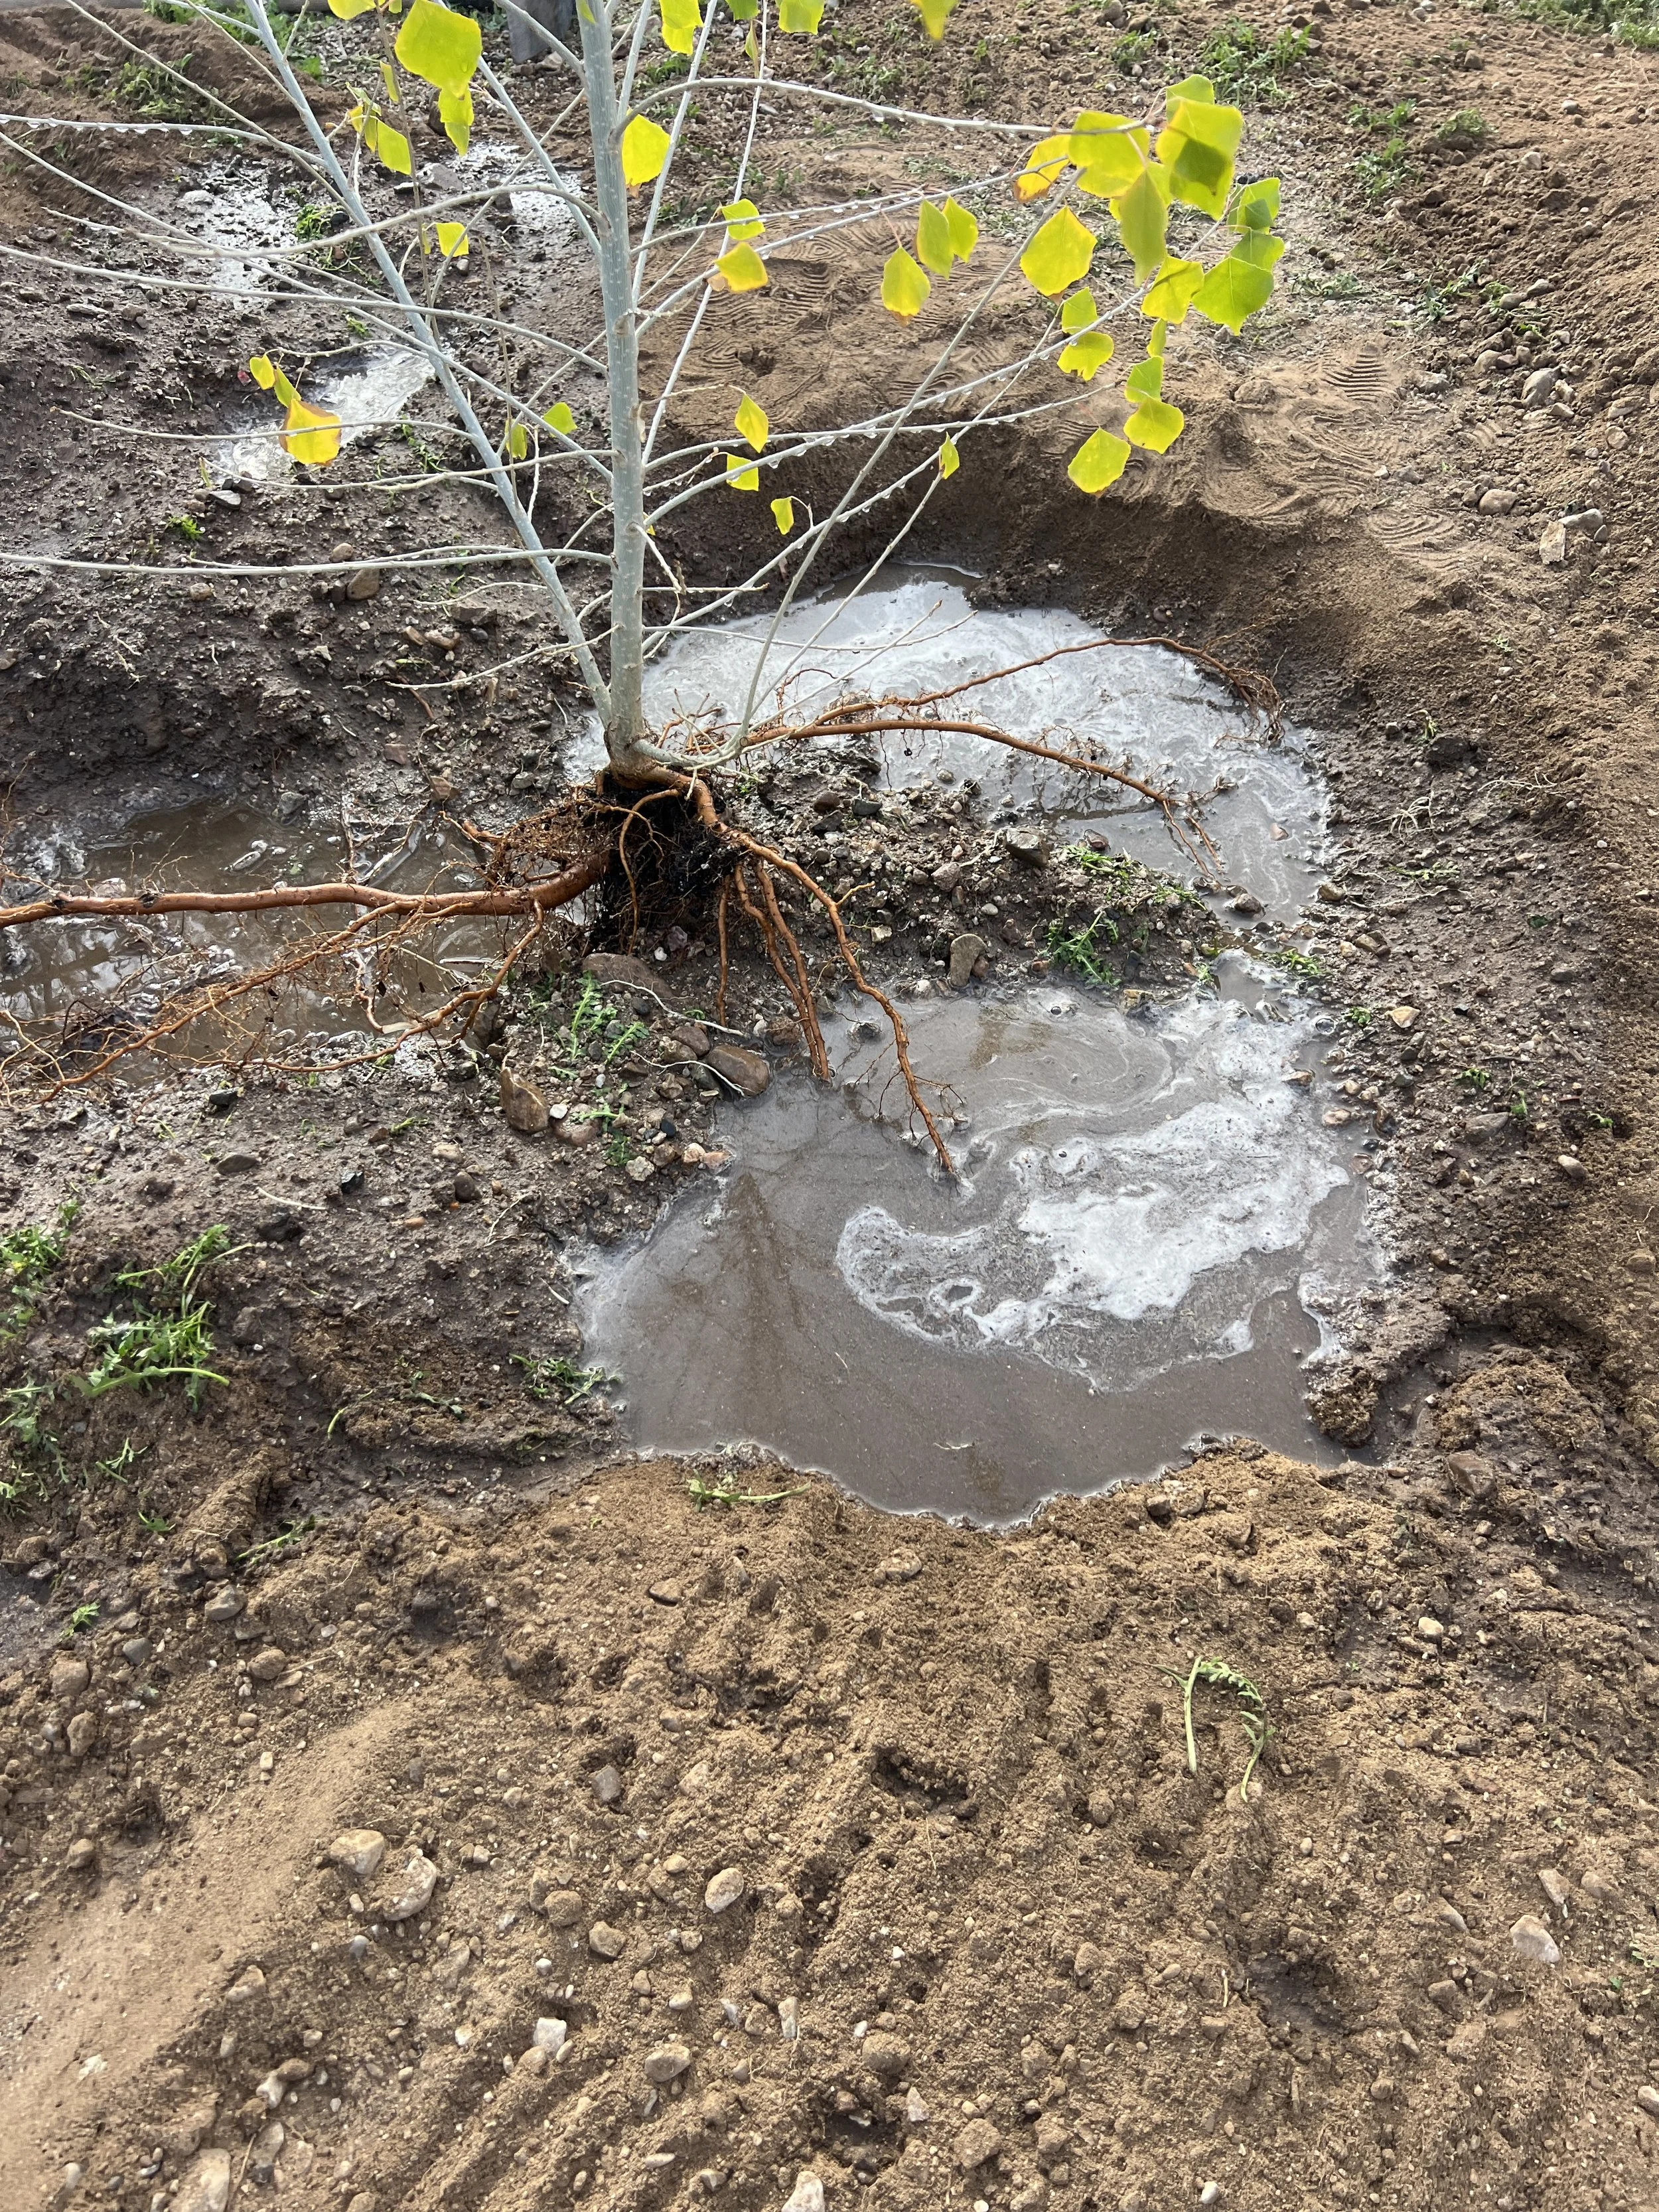
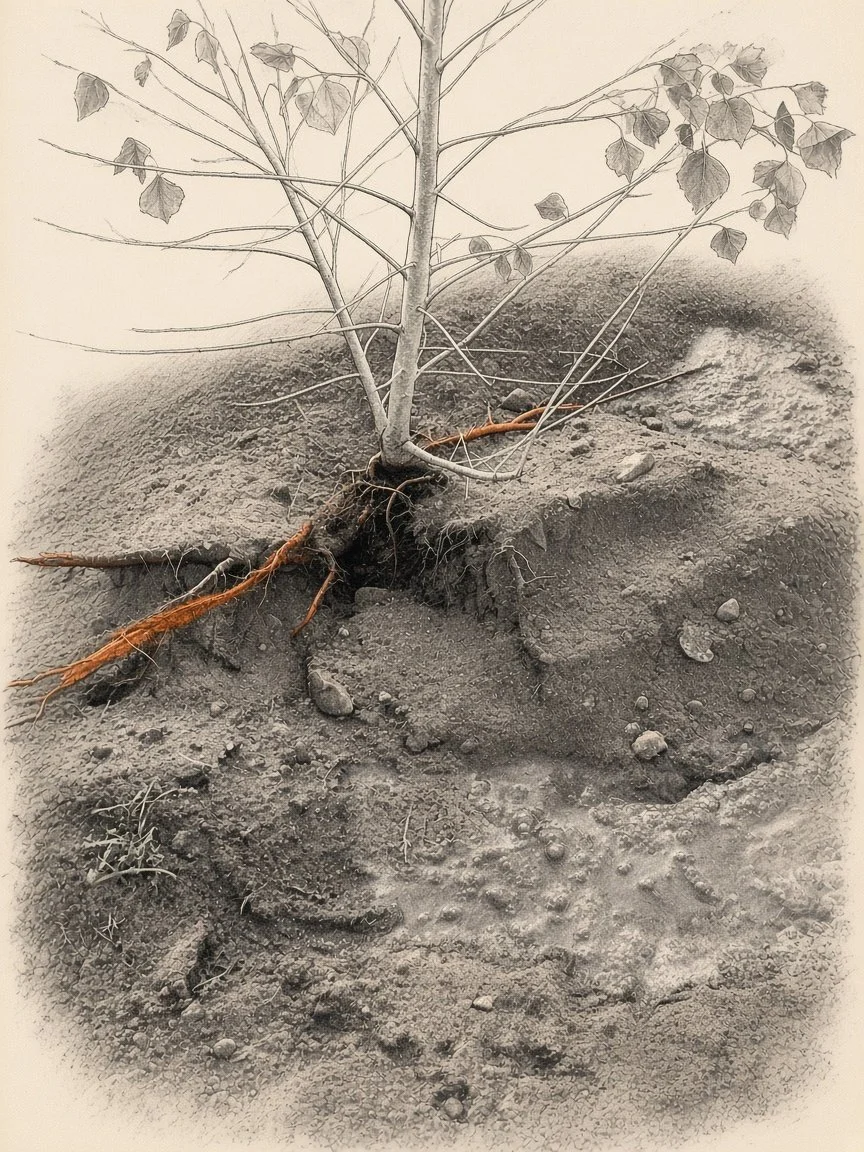
Justin dug trenches to house lateral roots that extended several feet from the trunk. Instead of confining those roots to a small planting hole, he created space for them to reach outward.
This is the defining feature of the replanting sequence. The receiving area follows the tree's retained roots. The photograph shows the channels around the trunk and the roots laid into them, with water visible in parts of the excavation.
The illustration highlights the relationship between the roots and the planting space. For another tree, the layout should follow its own root pattern. Allow roots to extend naturally, with soil supporting them and room for their branching structure.
5. Replant at the natural depth
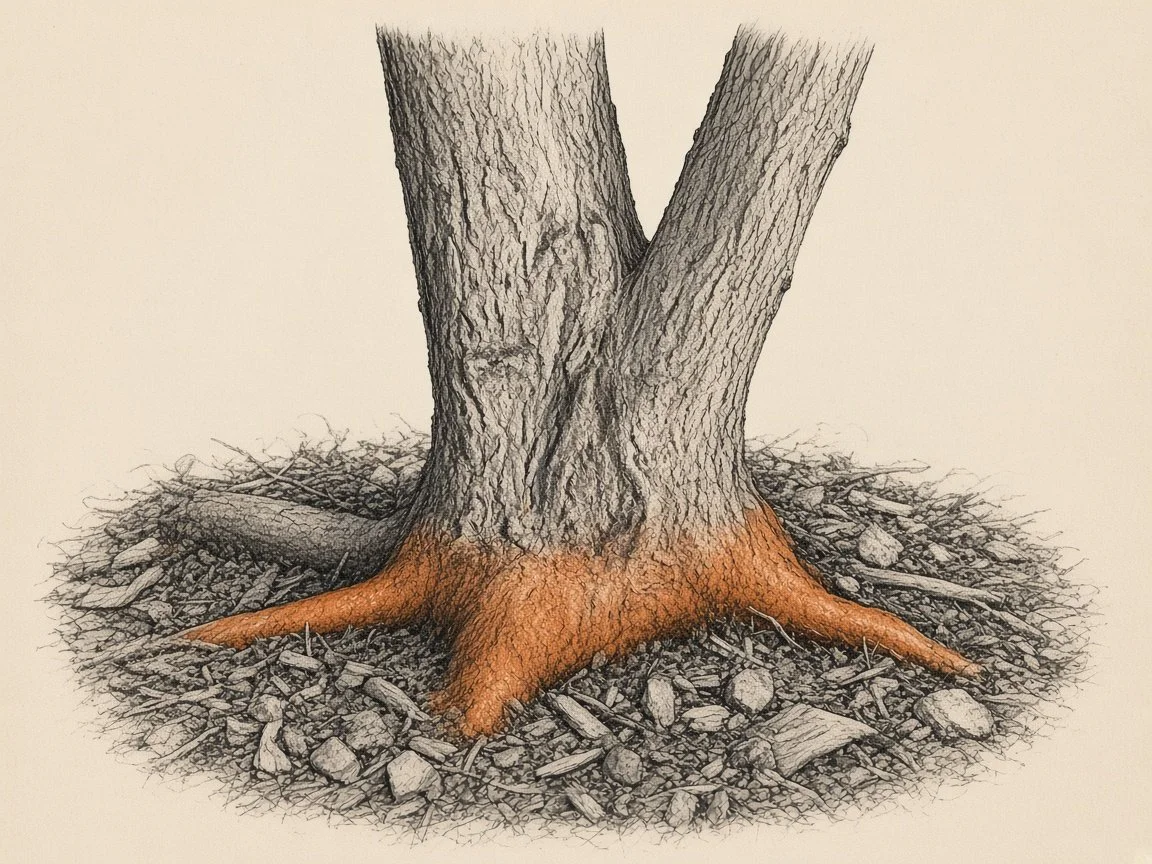
Justin replanted the cottonwood at the depth where it naturally grew. The finished view shows the trunk-to-root transition near the soil surface.
That transition is the root crown, or root collar. It belongs near the surface, with roots covered by soil and trunk bark above ground. Finding it before replanting gives you a clear reference for setting the tree at the right depth.
For homeowners, the practical goal is simple: give the roots the space they need while keeping the trunk base at an appropriate finished grade. Backfill around the roots, maintain their natural outward arrangement, and check the collar's position as the soil settles.
The result: growth above ground and development at the base
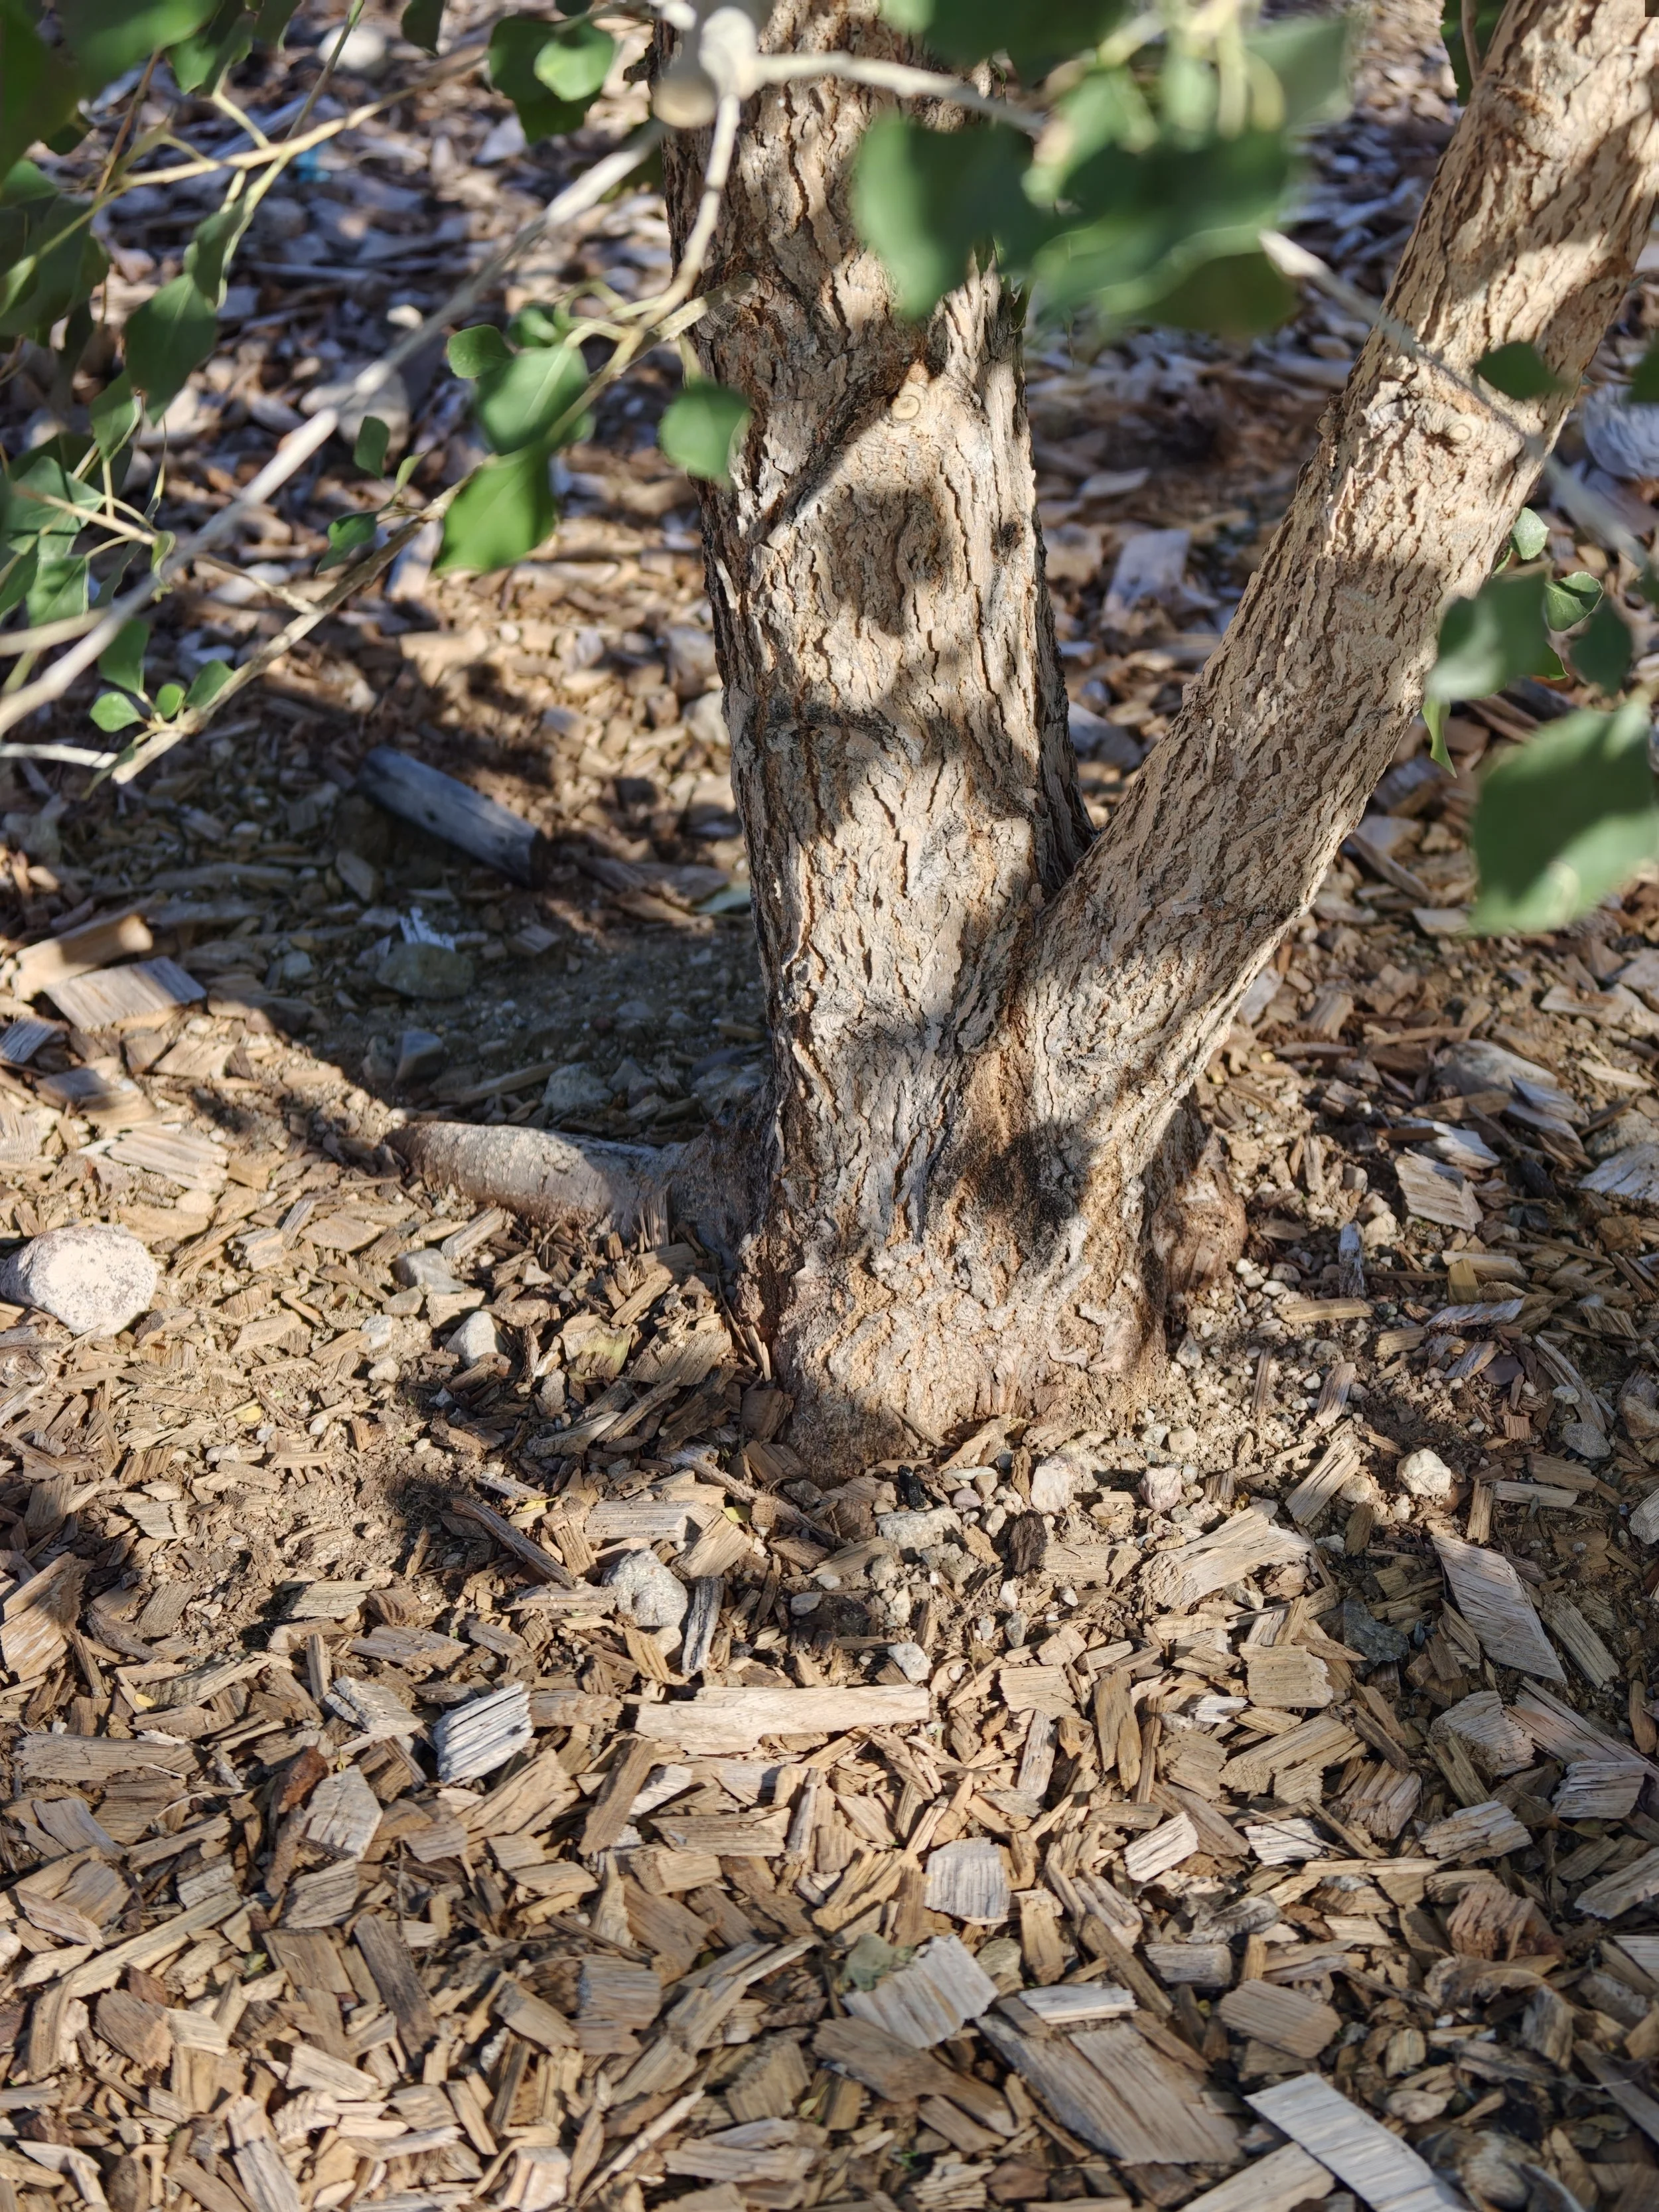
The later photographs complete the story. The tree has a substantial leafy canopy, and the root-crown close-up shows a broadening base meeting a prominent lateral root at the surface. It is an extraordinary result for this seed-grown cottonwood and a rewarding example of attentive transplant work.
The companion article, Fremont Cottonwood Establishment — From Seed to Established Tree, pairs the early planting and later root-crown views to showcase that development.
Keep caring for the tree as it grows
The next stage is ongoing care suited to the tree and its site. For a young tree in Tucson:
Water the rooting area. Check soil moisture and drainage, and expand irrigation coverage as the tree grows. Match watering to the species, soil and season.
Protect the soil. Use a broad mulch layer while leaving space around the trunk and keeping the root collar visible.
Stake only when support is needed. Allow gentle trunk movement, check ties regularly and remove support once the tree can stand securely on its own.
Plan for mature size. Fremont cottonwood needs generous growing space and a reliable water supply as its canopy expands.
Justin's method centered on a clear priority: keep the existing roots with the tree, give them room in the new location, and preserve the natural planting depth. The photographs show how that work came together—and the exceptional growth and development that followed in his garden.